

Customer setup, sales documents, invoicing, collections reminders, and cash application — the full order-to-cash lifecycle in plain language, for the teams who actually run it.
The Order-to-Cash Lifecycle in BC
Before we get into the detail, here’s the shape of the full process. Not every BC organization uses every stage — some invoice directly without sales orders, some skip formal reminder letters in favor of phone calls, some have fully automated cash application through bank feeds. That’s fine. What matters is knowing what the complete arc looks like so your decisions about which steps to use are intentional ones, not gaps you discover later.

Setting Up Customers — The Foundation That Everything Else Builds On
I said this about vendors in the AP post and I’ll say it again here: the customer card in BC is not just a contact record. It’s the configuration that controls how every transaction for that customer behaves — which accounts their invoices hit, when those invoices are due, whether their credit is checked, and what tax rate applies. The five to ten minutes it takes to set up a customer card correctly is some of the most leveraged time in the whole AR implementation.
General Tab — Posting Groups and the Fields That Drive GL Behavior
The two fields that are required before anything will post
Just as with vendors, the Customer Posting Group and Gen. Bus. Posting Group are the two required posting assignments on every customer card. The Customer Posting Group determines which AR summary account this customer’s balances land in on the GL. The Gen. Bus. Posting Group drives the General Posting Setup lookup that determines which revenue and discount accounts their invoices hit. If either is missing, no transaction will post — BC will stop you with an error before anything goes through.
The Currency Code field matters here too, exactly as it does on vendor cards. Leave it blank for local currency customers. For customers invoiced in a foreign currency, populate it so invoices default to the right currency automatically instead of requiring your billing team to change it manually on every transaction. And when a foreign-currency customer pays, BC applies the exchange rate that was in effect at invoice date and posts the realized gain or loss to the account configured in your GL setup. That account needs to exist before the first foreign-currency payment is applied.
Required Fields — Confirm Before Any Transaction
- Customer Posting Group — required; controls the AR summary account
- Gen. Bus. Posting Group — required; drives the General Posting Setup revenue lookup
- Currency Code — required for foreign currency customers; blank = local currency
- Customer number series — confirm it’s configured before your first manual entry or migration run
Payments Tab — Terms, Methods, and the Fields Your DSO Depends On
Small fields with large consequences for your cash timing
The Payment Terms Code is the single most important AR configuration field for day-to-day cash management. It defines when invoices to this customer are due, drives the due date calculation on every invoice, and determines how the customer appears in your AR aging report. Net 30, Net 60, 2/10 Net 30 — whatever the actual agreement is. If the terms on the customer card don’t match your actual contract, your due dates are wrong, your aging is wrong, and your collections team is either chasing customers who aren’t late yet or letting genuinely late customers slide.
If you offer early payment discounts — and have customers who actually take them — the Payment Discount % and Discount Date Calculation fields on the customer card are where those terms live. BC will calculate the discount amount automatically on each invoice and apply it when payment arrives within the qualifying window. If these fields are blank, your billing team has to handle discounts manually every time a customer takes one, which creates both effort and inconsistency.
The Reminder Terms Code field is easy to overlook during setup and genuinely important for collections. It assigns the reminder sequence that determines which reminder level this customer receives as their balance ages — and when. We’ll cover reminder configuration in detail later in this post, but the assignment starts here, on the customer card.
Payment Tab — Review Against Contracts
- Verify payment terms against your actual customer agreements — not just what was in the legacy system
- Configure early payment discount terms now, even if discount volume is low — manually managing discounts after the fact is error-prone
- Assign Reminder Terms Code on every customer during setup — don’t leave it blank and add it later when an account goes overdue
- Payment Method Code on the customer card defaults onto cash receipt journals — set it so cash application doesn’t require a method selection every time
Credit Limits — The Conversation Worth Having Before Go-Live
Not glamorous. Very protective.
Business Central supports credit limit checking at the point of sales order entry. When a customer’s outstanding balance plus their new order would exceed their credit limit, BC can warn the order entry person, block the order entirely, or do nothing — depending on how you configure it in the Sales & Receivables Setup under the credit warnings option.
Here is the honest conversation about credit limits in BC: the most common configuration I see is a credit limit of zero on every customer and a credit warning setting of “No Warning.” This means the credit limit check does nothing at all. It’s the path of least resistance during setup, and it’s the configuration that produces the unpleasant surprise six months after go-live when a customer with a large overdue balance continues to receive and accumulate new orders while Finance is still trying to collect on the old ones.
I’m not saying every BC organization needs hard credit blocks on every customer. Some organizations have strong relationships and low credit risk. But the decision to not enforce credit limits should be a deliberate choice made with Finance leadership — not the default outcome of nobody thinking about it during setup. If you choose not to enforce limits, know why. If you do want limits enforced, set them now, before go-live, when you can test the blocking behavior without disrupting live business.
Credit Limit Decisions to Make Intentionally
- Decide on credit warning behavior (No Warning, Warning, Error) in Sales & Receivables Setup — as a Finance leadership decision, not a project default
- Assign realistic credit limits during customer migration — even rough segment-based defaults are better than zero across the board
- Identify which customers, if any, are explicitly exempt from credit holds (key accounts, intercompany) and document that exception
- Test the blocking behavior in sandbox with an actual sales order scenario before go-live
Tax Settings — Exemptions Before the First Invoice, Not After
The detail that creates the most retroactive pain when skipped
Tax-exempt customers need their exemption status and certificate number recorded on their customer card before any invoices are generated. BC uses the Tax Area Code and Tax Liable fields (or the VAT Business Posting Group, depending on your localization) to determine whether tax applies to a given transaction. A tax-exempt customer whose record isn’t configured correctly will get charged tax on every invoice until the configuration is fixed — and correcting those invoices retroactively requires credit memos, re-invoicing, and explanations to customers who were billed incorrectly.
For organizations with multi-state US sales tax obligations, the Tax Area Code configuration is where geographic tax jurisdictions are managed. A customer in California has a different Tax Area Code than a customer in Texas or Oregon. If your organization is required to collect sales tax in multiple states, this configuration needs to be done thoughtfully and reviewed by your tax team — not inferred by a consultant who doesn’t know your nexus situation.
Tax Setup — Non-Negotiable Timing
- Identify all tax-exempt customers before migration — do not treat this as post-go-live cleanup
- Load exemption certificate numbers on exempt customer records; this is an audit requirement in most jurisdictions
- Review Tax Area Code assignments with your tax team for multi-state customers — don’t guess at nexus
- Test sales tax calculations with real customer and item combinations in sandbox before go-live
Default Dimensions — The Automation That Keeps Your Revenue Data Clean
Set it once, coded correctly forever
Default dimensions on the customer card work exactly as they do on vendor cards — dimension values you assign here automatically populate on every sales order and invoice for that customer. If a particular customer’s revenue always belongs to the Northeast region, the Retail channel, or a specific business unit, set those defaults on the customer record. Every invoice posts with the right dimension coding automatically, without your billing team having to select values manually.
For customers with consistent dimension coding — which is most of them — this setup pays back with every single invoice. For customers whose dimension coding varies by transaction (a distributor who resells into multiple channels, for example), you may choose to leave specific dimensions blank at the customer level and require entry at the invoice line. Just make sure that decision is deliberate, documented, and your billing team knows it’s expected.
Dimension Defaults — Do This During Migration
- Assign default dimensions as part of customer data migration — not as a post-go-live enhancement
- Inconsistent dimension coding on revenue is harder to clean up than on expenses — it affects your revenue reporting from day one
- If a customer’s dimension assignment changes (they shift to a new territory, for example), update the customer card default so all future invoices reflect the change
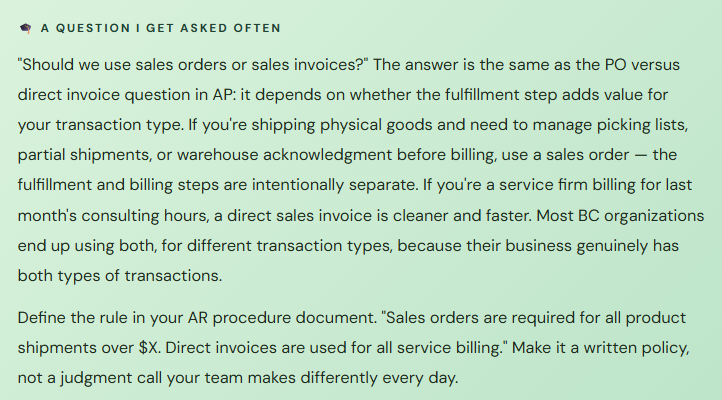
Sales Documents in BC — Which One for Which Situation
BC gives you several sales document types, and the right one depends on what you’re trying to do. Using the wrong document type isn’t always an immediate error — sometimes it just creates a subtle problem that shows up weeks later in your AR aging or your inventory reconciliation.
01 Sales Order
The full order management document — handles picking, shipping, partial fulfillment, and generates an invoice when you’re ready to bill. Use when you need to manage the physical fulfillment process separately from the billing step, or when customers order in advance of delivery.
Best for: product sales, partial shipments, warehouse fulfillment workflows
02 Sales Invoice
Direct billing without a preceding sales order — posts immediately when you’re ready to invoice. No picking or shipping step required. Use for service charges, subscriptions, consulting fees, and any sale where you’re billing without managing physical goods movement.
Best for: service invoicing, recurring billing, straightforward product sales with no fulfillment complexity
03 Sales Credit Memo
Records a credit to the customer — a return, a pricing correction, a billing error. Reduces the customer’s balance and reverses the original revenue posting. This is the right tool for customer credits; don’t use a manual journal entry to reduce AR — it bypasses the subledger and creates a reconciliation problem.
Best for: returns, pricing adjustments, invoice corrections
04 Sales Return Order
For physical goods being returned, a sales return order handles the receiving process — the goods come back into inventory — as well as the credit memo generation. Using a return order instead of a standalone credit memo keeps your inventory accurate and reverses COGS correctly. The standalone credit memo doesn’t bring the goods back into stock.
Best for: physical inventory returns where goods are coming back to your warehouse
05 Recurring Sales Lines
A template for invoices that repeat on a schedule — monthly retainers, annual maintenance fees, subscription billing. You set up the recurring line template once and generate invoices from it on demand or on a batch schedule. Significantly less manual work than recreating the same invoice every billing cycle, and fewer opportunities for data entry errors on the repeat.
Best for: any invoice that repeats with the same customer, same amounts, same coding
06 Sales Quote / Blanket Order
Sales quotes are non-posting documents that can be converted to sales orders when the customer accepts. Blanket orders are long-term sales agreements that release into individual orders over time — useful for customers who commit to a volume for the year and release against it monthly.
Best for: pre-sale proposals and long-term volume agreements
Posting a Sales Invoice — What Actually Happens
When you post a sales invoice in BC, several things happen at once — and understanding the chain helps you trace what went wrong when something posts unexpectedly. Let me walk through exactly what BC does the moment you click Post on a sales invoice.
| What BC Does | Why It Matters | Where It Could Go Wrong |
|---|---|---|
| Creates a customer ledger entry | This is the receivable — the amount the customer owes. It appears in the customer’s open ledger entries and in your AR aging. | If the customer’s posting group assignment is wrong, this entry lands in the wrong AR summary account on the GL |
| Posts revenue to the income statement | Revenue hits the account from your General Posting Setup — the intersection of the customer’s Gen. Bus. Group and the item’s Gen. Prod. Group. | If a posting setup combination is missing or misconfigured, BC throws a posting error here — which is frustrating but better than posting to the wrong account silently |
| Calculates and posts sales tax | Tax is calculated based on the customer’s tax area and the item’s tax product group, and posted to the sales tax liability account. | If the customer is tax exempt but their record isn’t configured that way, tax is charged incorrectly on every invoice until the record is corrected |
| Relieves inventory (for item lines) | For invoices with item lines — physical goods — inventory quantity and value decrease. COGS is debited via the inventory posting setup. | If the item’s inventory posting group is misconfigured, COGS posts to an unexpected account. The sale appears correct on the surface but gross margin reporting is wrong. |
| Generates a posted invoice document | The posted invoice is the permanent record — it can be printed, emailed to the customer, and retrieved in audit. The original draft invoice is gone; the posted document replaces it. | If your invoice template or email configuration isn’t set up, the system posts successfully but nothing goes to the customer — they never know they have an invoice until they call or you follow up manually |
| Applies financial dimensions | Dimension values from the customer default, the item, or manually entered on the invoice lines are captured on the GL entries. This is what enables revenue reporting by region, channel, or business unit. | If no dimension defaults are set and the billing team doesn’t enter them manually, the revenue posts with blank dimensions — invisible in segment reporting until someone notices the gaps |
Six things happen simultaneously from one Post click. All six need to be configured correctly, and all six are driven by the customer card setup, posting groups, and item configuration we covered earlier in this series. This is why the setup work isn’t optional. Every shortcut taken in setup shows up as a specific problem in this list.
Reminder Letters — BC’s Built-In Collections Tool
Business Central has a reminder system that most organizations configure once and then underuse — or configure in a hurry and then regret because the letters are going to the wrong people at the wrong time. When it’s properly set up and running, it’s a genuinely useful collections tool that reduces the manual “did you remember to send reminders this week?” anxiety for your AR team.
The reminder system works through Reminder Terms — a defined sequence of escalating reminder levels, each with a minimum number of overdue days before it fires, a fee amount if you charge reminder fees, and a letter template. You assign reminder terms to customers (on the customer card), and when you run the Create Reminders batch process, BC evaluates every customer’s open invoices, determines which reminder level they’ve reached based on the aging, and generates the appropriate letter. You review them, then issue them.
Reminder Level 1 — Gentle: First Notice — 7 Days Past Due
A polite reminder that an invoice is outstanding. Assumes the most charitable interpretation — the payment may have been missed, the invoice may have been lost. Tone is professional and non-threatening. No fee at this level for most organizations. Most customers pay after level 1.
Reminder Level 2 — Firmer: Second Notice — 30 Days Past Due
The tone escalates. References the previous reminder. May include a reminder fee if your terms include them. This is the level where most organizations also make a direct phone call, using the reminder letter as the formal written record of the second contact. Customers still outstanding at this stage need active attention, not just automated outreach.
Reminder Level 3 — Urgent: Final Notice — 60 Days Past Due
Clear language about consequences — potential credit hold, referral to collections, or legal action, depending on your policy. A higher fee if applicable. This letter should be reviewed by your AR manager or Controller before it goes out. Customers at this level often warrant a direct conversation alongside the written notice, not just the automated letter.
Beyond Reminders — Escalation: 90+ Days — Management Decision Required
At this point the automated reminder sequence has run its course. The decision to place a credit hold, refer to external collections, pursue legal action, or write off the balance is a management decision — not an automated system action. The reminder history BC has logged provides the documentation that this customer was formally notified at each stage, which matters for both internal accountability and legal proceedings if it gets there.
Three reminder configuration details that are easy to miss and important to get right:
First, the minimum balance setting on your reminder terms. You don’t want to send a formal collection notice to a customer with a $1.14 open balance from a rounding difference. Configure a minimum amount below which reminders are suppressed — most organizations set this between $25 and $100 depending on their typical invoice size.
Second, reminder fees post to the GL when you issue reminders that include fees. The account those fees hit is configured in your reminder terms setup and needs to exist in your chart of accounts. If it doesn’t, issuing the reminder produces a posting error and the reminder doesn’t go out.
Third, reminders are reviewed before issuing — the Create Reminders step generates drafts, the Issue Reminders step actually sends them. This two-step process is intentional. Always review the draft list before issuing, especially for the first few cycles after go-live, to confirm the right customers are receiving the right level.
Applying Customer Payments — Closing the Loop
Cash application in BC — matching payments to invoices — happens through the Cash Receipt Journal. You enter the payment, select the customer, and then apply it to the specific open invoices it pays. When you post the journal, the receivable closes, the bank account is debited, and the customer’s balance decreases. The AR aging updates in real time. It’s a clean, straightforward process when it’s done correctly — and a persistent source of data quality problems when it isn’t.
Cash Application in BC — Step by Step
1. Enter the Payment in the Cash Receipt Journal
Open the Cash Receipt Journal, enter the payment date, the customer number, and the amount received. Set the Document Type to “Payment.” The bank account line is generated automatically based on the bank account assigned to the journal batch. At this point the payment is entered but not yet applied to any specific invoices.
2. Apply to Specific Invoices
Use the Apply Entries function to open the customer’s open ledger entries — all their outstanding invoices — and select which ones this payment covers. You can apply one payment to multiple invoices, or one invoice to a partial payment with the remainder left open. BC shows you the balance to apply and the applied amount so you can see exactly what’s being closed before you post.
3. Handle Discounts and Partial Payments
If the customer took an early payment discount, BC recognizes it when you apply the payment and the payment amount is less than the invoice amount but within the discount window. The discount amount posts to the payment discount account configured in your Customer Posting Group. Partial payments leave the invoice open for the remaining balance — the original invoice isn’t closed until it’s fully paid or written off.
4. Post the Cash Receipt Journal
Posting debits the bank account and credits the AR summary account, closing the applied customer ledger entries. The customer’s outstanding balance decreases. The payment appears in your bank reconciliation as an uncleared item until it’s matched against your bank statement. The receivable is gone from the aging — but the cash flow is only complete when the bank confirms the payment cleared.
5. Reconcile Against Your Bank Statement
Posted cash receipts appear in BC’s Payment Reconciliation Journal as outstanding items until they’re matched to your actual bank statement. BC can import bank statement files and automatically suggest matches, significantly reducing manual reconciliation time. An unreconciled payment means your book cash says one thing and your actual bank balance says another — don’t let that gap accumulate.
Credit Management in BC — Knowing Where Your Customers Stand
BC gives you three customer credit states to work with, and understanding each one helps your AR team respond proportionally rather than either ignoring credit risk or over-reacting to customers who are simply slow payers.
Good Standing
Balance within credit limit, no significantly overdue invoices, sales orders process without interruption. Most of your customers should be here most of the time. If they’re not, the credit limit configuration or the collections process needs attention — or both.
Credit Warning
Customer is approaching or over their credit limit. BC shows a warning when a new sales order is entered for this customer, but doesn’t block it. The order goes through with a visible alert. Your order entry team sees it; what they do with it depends on your process and training.
Credit Hold / Blocked
The Blocked field on the customer card can be set to prevent new invoices, all posting, or both. This is the hard stop — no new business until the balance situation is resolved. The decision to block a customer should require AR manager or Controller authorization and should be documented.
The Blocked field on the customer card in BC is worth understanding in detail, because it has two settings that are often confused. Blocked: Invoice prevents new sales invoices and orders but still allows payment posting — meaning a blocked customer can still pay you, which is exactly what you want. Blocked: All prevents all transaction posting for that customer, including payment receipt. Use “Invoice” for collections holds. Reserve “All” for customers where you need to completely freeze the relationship — a customer in bankruptcy proceedings, for example, where even payment posting requires legal guidance.
BC-Specific Features Worth Using
A handful of BC capabilities that make AR operations materially better when they’re actually configured and used — and that are consistently underimplemented because they were never highlighted during the go-live sprint.
Payment Reconciliation Journal
BC can import your bank statement file directly and automatically match incoming payments to open customer ledger entries. The auto-match isn’t perfect — you’ll need to review and handle exceptions manually — but for organizations with high payment volume, the automation saves significant time and reduces the “did I apply that payment?” uncertainty that creates unapplied balance problems.
Copilot Bank Reconciliation Assist
BC’s Copilot assistance for bank reconciliation can suggest matches between bank statement lines and open transactions that the automatic matching didn’t catch — applying pattern recognition to descriptions and amounts. Like all Copilot features, it supports human review rather than replacing it. Worth enabling and testing; most AR teams find it noticeably reduces the manual matching workload.
Customer Aging Report
BC’s built-in customer aging shows outstanding balances by aging bucket — configurable buckets that should match your internal reporting periods. Run it at every period close. If the numbers require explanation to your Controller, the explanation should come from your understanding of specific customer situations — not from uncertainty about whether the report is accurate. Accurate aging starts with correct invoice and due dates on every transaction.
Customer Statements
BC can generate and send customer account statements showing all open invoices and their aging. These are different from reminder letters — statements are informational documents showing the full account picture, while reminders are escalating collection notices. Sending monthly statements to all customers, and weekly statements to overdue accounts, is one of the simplest and most effective collections habits an AR team can develop. Configure the statement templates and the send process so it’s part of your monthly close routine, not an ad-hoc effort.
Document Attachments on Invoices
Just as with purchase invoices on the AP side, BC allows document attachments on sales invoices — supporting documentation, delivery confirmations, signed contracts, dispute evidence. When a customer disputes an invoice, the ability to open the invoice record and immediately view the attached proof of delivery or contract makes the dispute resolution conversation much faster. Train your billing team to attach supporting documents as standard practice.
Customer Statistics FactBox
The Customer Card in BC has a Statistics FactBox that shows balance, overdue amount, outstanding orders, and payment history directly on the customer record without navigating to a separate report. When a customer calls to discuss their account or request a credit increase, your AR team has the key numbers immediately visible. Small feature, used constantly in daily AR operations.
The Mistakes That Cost BC AR Teams the Most
Unapplied Cash Receipts Accumulating in Customer Accounts
A cash receipt that gets posted to the Cash Receipt Journal but never applied to a specific invoice creates an open credit entry in the customer’s ledger. The AR aging shows the invoice as still open — because in the system, it is. The bank account shows the payment — because the money arrived. Your Controller asks why a customer shows $8,000 overdue when you know they paid last week. The answer is that the payment was recorded but never applied. This is the most common AR data quality problem I see in BC, and it compounds over time into an aging report nobody fully trusts.
→ Make unapplied credit review a weekly procedure. BC has a report specifically for open customer ledger entries showing credits — run it every week and apply any credits older than a few days. It is a ten-minute review that prevents months of accumulated confusion. Include it in your period-close checklist as a required step before the aging is presented to leadership.
Reminder Terms Assigned to Nobody
This is the most common reminder system gap. The Reminder Terms are configured in setup — the levels exist, the letters are drafted, the fees are defined — but the Reminder Terms Code field on actual customer cards is blank. So when you run Create Reminders, nothing generates, because no customers are assigned to a reminder sequence. The AR team runs it once, sees no output, assumes it’s broken, and goes back to managing collections manually. The system can do the work. It just needs the assignment.
→ As part of customer data migration, assign a Reminder Terms Code to every customer. Create a default reminder sequence that applies to most customers and assign it in bulk. Create a separate sequence (or no assignment) for customers who manage under relationship-based collections. Run the Create Reminders process in sandbox with real customer data before go-live so you can confirm the right customers are generating reminders at the right levels.
Returns Processed as Manual Credit Memos When Goods Are Coming Back
When a customer returns physical inventory and the AR team posts a standalone sales credit memo to reduce the balance, the inventory never returns to stock. The customer’s AR balance is corrected. The revenue is reversed. But the goods are sitting in your receiving dock and the inventory system says they don’t exist — because no return order was created to receive them back. Your inventory is understated. The COGS that was recorded when the goods shipped was never reversed. The warehouse team finds product with no system record to match it against.
→ Train your AR and warehouse teams together on the sales return order process. Physical goods coming back require a return order — which creates the proper inventory receipt and reverses COGS correctly. Standalone credit memos are for billing corrections and service credits where there’s nothing to put back on a shelf. Define the rule in your AR procedures and include the return order process in your go-live training for both teams.
Invoice Email Configuration Not Tested Before Go-Live
BC can email posted invoices directly to customers through configured SMTP or Microsoft 365 email integration. This configuration needs to be set up, tested, and confirmed working before the first live invoice posts. I have seen go-lives where the email configuration wasn’t tested, the first week of invoices posted successfully, and nothing was delivered to any customer — because the email setup had an authentication issue that only manifested in production. Customers didn’t know they had invoices. Payment terms started running. Nobody realized until the first invoices hit their due dates and calls started coming in.
→ Test invoice email delivery in your production environment — not just sandbox — before go-live. Send a test invoice to an internal email address and confirm receipt. Verify the invoice PDF is attached and legible. Confirm the “From” address is appropriate and won’t trigger spam filters for your customers. This is a twenty-minute test that prevents a very uncomfortable first-week experience.
Finance Dimension Gaps on Revenue Transactions
Revenue dimension coding errors are subtler than expense ones — they don’t usually cause posting failures, they just cause silent misallocation. A sales invoice that posts without dimension values doesn’t generate an error. It posts successfully to the right revenue account. But when your VP of Sales asks for Q3 revenue by region and the data shows $200,000 unallocated because invoices were posted without regional dimension values, that conversation is difficult. And reconstructing which revenue belongs to which region from invoice-level data, after the fact, across hundreds of transactions, is genuinely unpleasant work.
→ Assign default dimensions to every customer card during migration, and configure your account structure to make revenue dimension values required at posting time. If a dimension value is required but missing, BC will prompt before posting — preventing the silent allocation gap rather than finding it later in a reporting discrepancy.
Credit Limits Set to Zero and Never Revisited
Zero credit limits with no enforcement warning means BC’s credit management feature does nothing. It’s not configured — it’s disabled by default. The first time a customer with a $40,000 overdue balance places a new $15,000 order, the order goes through without a flag, ships, and generates another invoice for a customer who isn’t paying their existing ones. Your AR balance for that customer is now $55,000, the relationship is increasingly strained, and the credit management tool that could have caught this at $40,000 was never activated.
→ Set the Credit Warnings field in Sales & Receivables Setup to “Warning” at minimum, and assign realistic credit limits to your customer base as part of migration. Have your Controller or AR manager define credit limit tiers — by customer size, payment history, or industry risk — and apply them systematically. A warning that doesn’t block orders still surfaces the risk at the point of order entry, which is infinitely more useful than discovering it at month-end collections review.
Quick Reference: Do’s and Don’ts
✓ Do This
- Assign Customer Posting Group and Gen. Bus. Posting Group to every customer — required before any transaction posts
- Set currency code on every foreign currency customer before any invoicing begins
- Verify payment terms against actual customer contracts during migration
- Assign Reminder Terms Code to every customer during migration — blank means no reminders generate
- Configure tax exemptions and load certificate numbers before the first invoice posts
- Set credit limit warnings in Sales & Receivables Setup and assign realistic credit limits
- Assign default dimensions to customer cards during migration to keep revenue coding clean
- Test invoice email delivery in production before go-live — not just in sandbox
- Apply cash receipts to specific invoices before posting — don’t leave open credits aging
- Review unapplied customer credits weekly as a standard AR procedure
- Use sales return orders for physical inventory returns — not standalone credit memos
- Run Create Reminders on a defined schedule and review drafts before issuing
✗ Don’t Do This
- Leave posting group fields blank and expect to fix them after transactions have posted
- Assume tax-exempt status can be added retroactively — configure it before any invoices post
- Leave credit limits at zero and assume credit management is active — zero means disabled
- Skip Reminder Terms Code assignment and then wonder why reminders don’t generate
- Post a manual journal entry to an AR account to “fix” a customer balance — use a credit memo
- Process inventory returns as standalone credit memos when goods are physically coming back
- Let unapplied cash receipts age without a weekly review and application process
- Skip invoice email testing and discover the configuration issue when customer calls start coming in
- Ignore revenue dimension coding — gaps in dimension values on posted revenue are hard to reconstruct
- Use Blocked: All for a collections hold — use Blocked: Invoice so customers can still pay you
- Issue reminders without reviewing the draft list first, especially for the first few cycles
- Treat cash application as optional — a posted but unapplied payment is an open invoice in your aging
The honest reflection from someone who’s closed a lot of AR month-ends: AR in Business Central is one of the places where the system’s accessibility works most in your favor. The reminder system isn’t complicated to configure. Cash application isn’t hard to do correctly. Credit limits take twenty minutes to set up meaningfully. None of it requires deep technical expertise. What it requires is deliberate attention during setup, clear procedures for the AR team, and a handful of habits — applying payments, reviewing aging, running reminders on schedule — that turn a configured system into a working process.
The difference between an AR function that runs smoothly and one that requires constant firefighting is almost never the system. It’s almost always the habits. Build the habits from day one, and BC will reward you with AR data you can actually trust.
Up Next:
We’ve covered the core financial modules — chart of accounts, posting groups, AP, and AR. Now it’s time to talk about the reporting layer that sits on top of all of it: Financial Reporting in Business Central — how to build financial statements, use account schedules (now called Financial Reports in current BC versions), and get the analysis views and dimensions-based reporting that your leadership actually needs. Because configuring a system that captures data correctly is only half the job. The other half is turning that data into reports people can use.
Until then — apply your payments, assign your reminder terms, and set your credit limits to something other than zero.
— Bobbi
D365 Functional Architect · Recovering Controller
Leave a Reply