
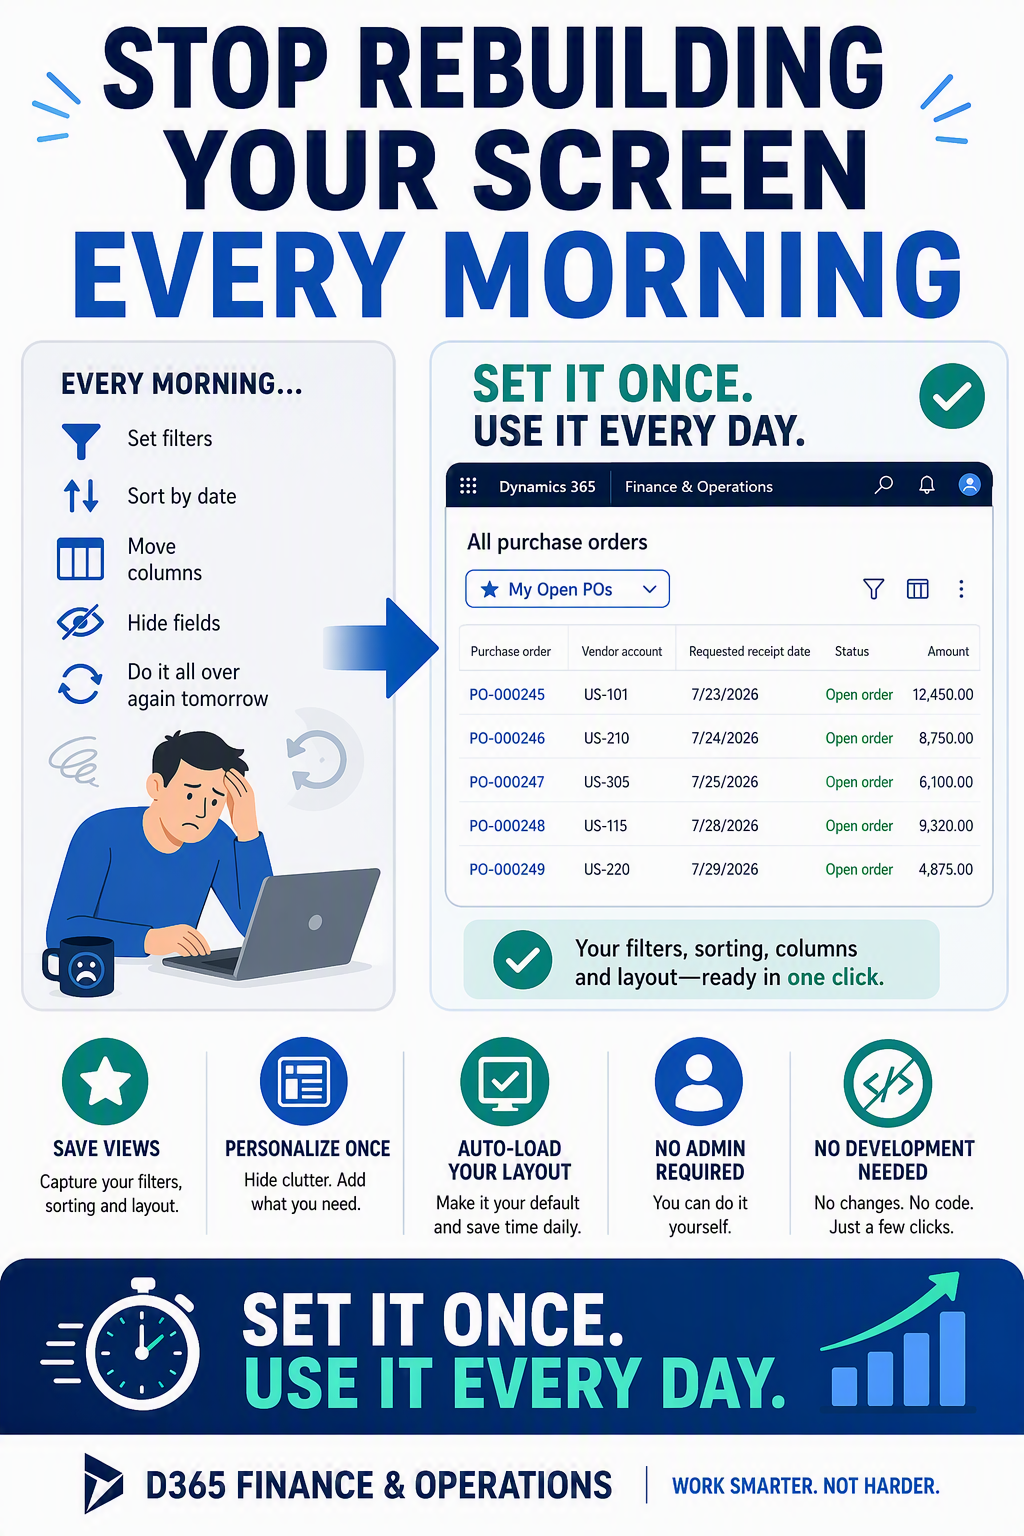
Set It Once · A back-to-basics series on configurations · D365 Finance & Operations
Saved views and personalization are the closest thing D365 Finance and Operations has to a magic button, and you do not need an administrator to use them.

Here is a scene I see on almost every project. Someone opens the All purchase orders page, filters to their own open lines, sorts by date, drags a couple of columns around, and finally gets to work. The next morning, they do the whole thing again. And the morning after that…
Nobody tells them there is a better way, because they assume the user knows it, or they were never taught how to do it themselves in the implementation/training. The feature that fixes it lives quietly behind a small dropdown most people never click on their own. It is called saved views, and it pairs with personalization, the ability to reshape a page so it fits the way you actually work. Neither one requires a change request, a developer, or special access. You can do all of it yourself, today, and undo any of it just as easily.
Let me take the mystery out of it.
The idea in one minute: What these two features actually do
Think of a form in F&O as having two layers. The bottom layer is the standard page everyone shares. The top layer is yours. When you hide a field, add a column, or save a filter, you are drawing on your layer only. Other people never see your changes, and you can wipe your layer clean at any time to return to the original.
Personalization is how you reshape a single page: hide clutter, surface the fields you care about, and rearrange things into an order that makes sense to you. Saved views take a snapshot of that arrangement, along with your filters and sorting, and let you name it and reload it in one click. You can even tell a view to open automatically, so the page greets you already set up the way you like.
When you make changes to your view, by adding columns, filtering or calculating, you will see a small asterisk show up at the right corner of “Standard view”
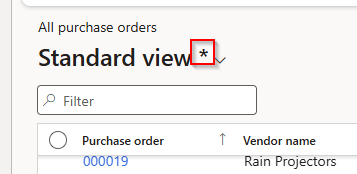
To save this view, click on the down carrot, and then “Save as…”

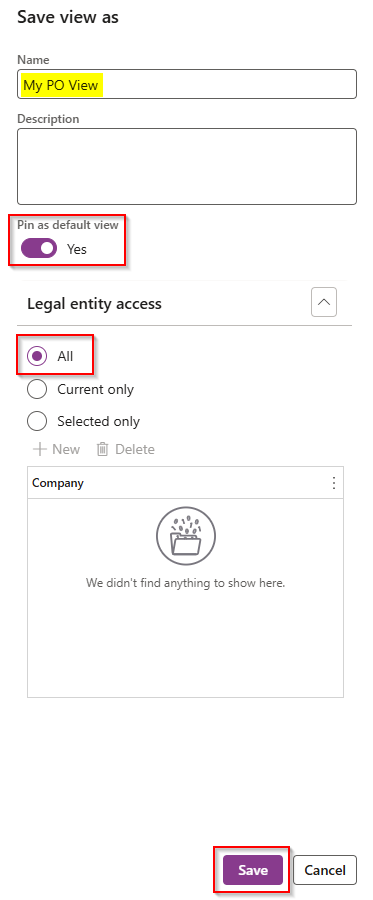
You will then be prompted to name the view, and you can choose to have the view be your default so that time you go to this list view (in my example, All purchase orders.) You can also take it one step further and choose which Legal Entities you would like to see this view. In my example, I would like this to be the standard for me in all LEs. Then choose, “Save” for your changes to take place.
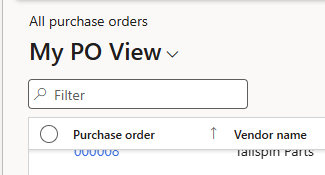
When I refresh my screen, I see that for this grid view (All purchase orders) my customized view has been saved and defaults
How-to: Four wins you can set up today
1. Hide the clutter and surface what you need
Open a page you live in every day. Using the example from above, I will use All purchase orders as the example.
Right-click any field or column you never use and choose Hide. It disappears from your view instantly.
To add a field or bring one back, open the toolbar: Options → Personalize this form. (If you’ve never tried this, the screen shot below shows what you will find when you follow this path.)
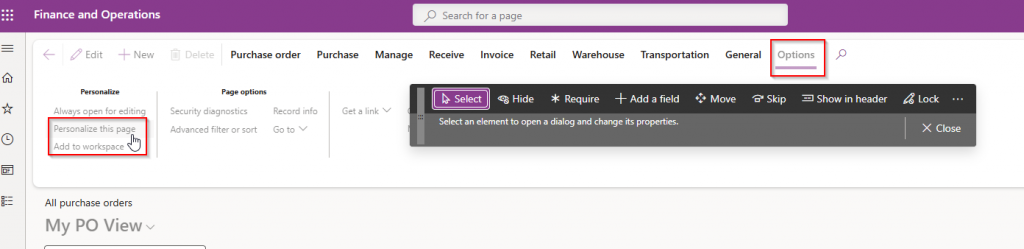
Use the Add field button to insert a field from the available list, then drag it wherever you want it.
Close the toolbar. Your changes save on their own, no Save button required.
2. Filter once, then save it as a view
- On your list page, filter it the way you want. Click a column heading to filter that column, or open the filter pane for something more detailed. This follows similar to my first example, using the All purchase orders grid view.
- Sort by the column that matters most, such as requested receipt date.
- Open the view selector dropdown at the top-left, where it says Standard view.
- Choose Save as, give it a plain-English name like My open POs, and save.
- That view now lives in the dropdown. One click reloads your filter, your sort, and your layout together.
3. Make your view open automatically
- Maybe you’ve already created a personalized view, but find that you have to select it each time you go to that page. An easy way to do this is to set this as your default view.
- Open the view selector dropdown and pick the view you created.
- Open the dropdown again and choose Set as default for this page.
- That is it. From now on the page opens already filtered and sorted the way you like, every single time.
4. Add the column you keep hunting for
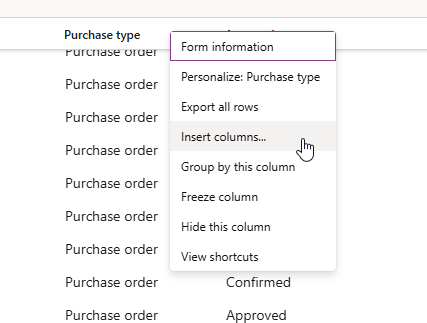
- Right-click any column heading in the grid.
- Choose Insert columns.
- Search for the field you always end up opening a record to find, such as requested delivery date or vendor account, and add it.
- Drag the new heading left or right to put it where your eye expects it.
- Save it into your view (#2) so the column sticks around for good.
The safety net that makes this risk-free
Every personalization you make is reversible. If a page ever looks wrong, go to Options → Personalize this form → Manage → Clear, and the page snaps back to standard. You cannot break anything for anyone else, and you cannot break it permanently for yourself. Nothing you do here touches your company’s data. Play freely.
Get started: A few views worth building this week
If you are staring at a blank slate, here are the ones I set up first on nearly every engagement. Each one replaces a small daily ritual with a single click.
My Open POs: Purchase orders you own that are still open, sorted by delivery date.
Invoices to Approve: Vendor invoices sitting in your queue, oldest first.
Unposted Journals: Your journals in a draft or not-posted state, ready to finish.
My Customers Past Due: Customer balances filtered to your accounts with overdue amounts.
None of this is the deep, complex configuration people expect when they hear the word D365. It is the opposite. It is a handful of clicks that quietly remove friction from every day that follows. Set it once, and the system starts working the way you do.
Up Next: Default Financial Dimensions – Automate Manual Typing of the Same Codes on Every Transaction
Thank you for reading!
Interested in learning more? Below are some of my latest posts:





Leave a Reply